There is something truly magical about stepping outside on a dark night and turning your gaze toward the vast universe. With a camera in hand and a bit of patience, you can transform ordinary evenings into extraordinary images of the Milky Way, star clusters, and distant galaxies. If you have ever looked up and wondered where to begin, this step by step guide is for you. We will cover practical gear, thoughtful planning, camera settings you can actually use, and friendly techniques that will bring your night sky photos to life. Welcome to the world of astrophotography, a rewarding intersection of science and art.
Step 1: Define Your Stargazing Goals
Before you buy gear or set up a shoot, take a moment to define your goals. Astrophotography is a broad hobby with several appealing paths. Your goals will shape the gear you choose and the techniques you practice.
- Milky Way photography on dark, moonless nights
- Wide field star photos of constellations and the night sky
- Deep sky photography of galaxies and nebulae (requires more equipment and planning)
- Time lapse sequences showing star trails or the rotation of the sky
- Planetary imaging with higher frame rates and precise focusing
Answering questions like these helps you avoid buying gear you will not use right away and gives you a clear progression path. For many beginners a practical starting point is a wide field Milky Way shot with a mirrorless or DSLR camera and a fast wide angle lens. As you gain experience you can expand to tracking mounts, longer exposures, and processing workflows.
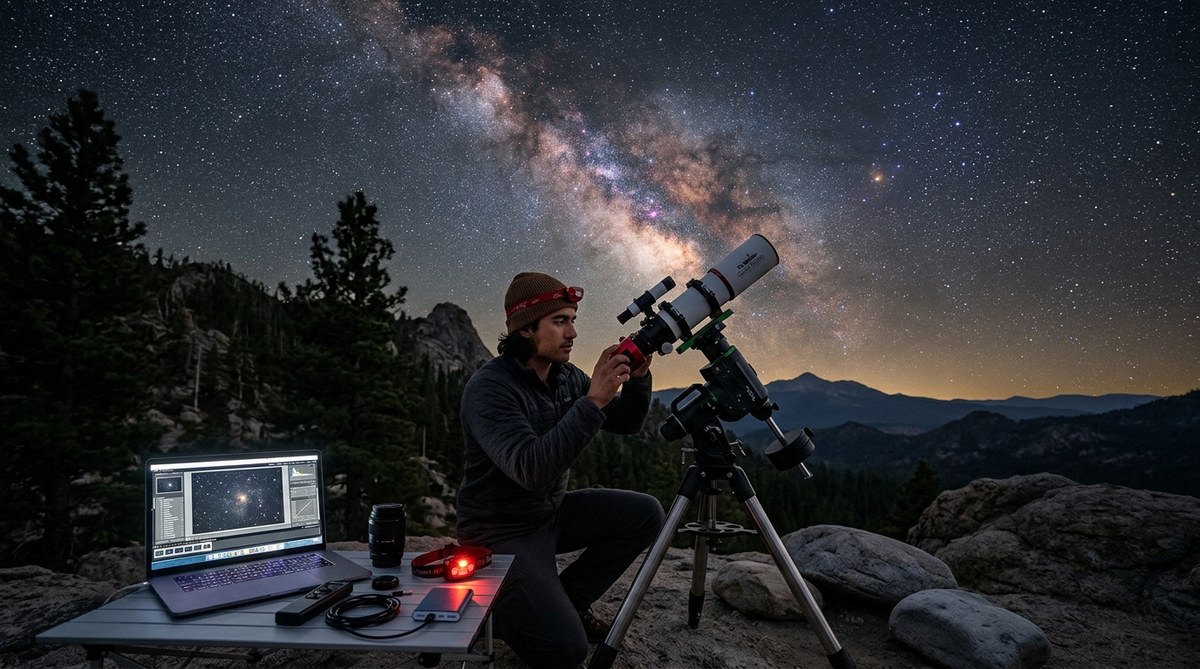
Step 2: Essential Gear for Beginners
Starting with the right tools makes your first nights more enjoyable and your results more satisfying. Here is a practical gear checklist designed for beginners, with optional upgrades as you grow.
Camera bodies and lenses
- A modern DSLR or mirrorless camera that can shoot in RAW. RAW files preserve the most detail and allow flexible post processing.
- A wide angle or standard lens in the range of 14 to 24 millimeters for foregrounds and big sky shots.
- A fast lens with wide maximum aperture (for example f/2.8 or faster) helps you gather light quickly in low light conditions.
Tripods and mounts
- A sturdy, stable tripod is essential for long exposures and star trails.
- A remote shutter release or on camera timer to avoid shake during the shot.
- A simple star tracker can be a great upgrade later if you want longer exposures without star trailing.
Other gear
- An intervalometer or the camera’s built in interval shooting mode for multi frame stacks.
- A red astronomy headlamp to preserve night vision while you set up.
- Dew prevention: a small dew heater or anti dew heater strap can keep optics clear on damp nights.
- Extra batteries and memory cards so you can shoot longer sessions.
Optional upgrades for more serious work
- A lightweight equatorial or_alt azimuth tracking mount to extend exposures without star trails.
- A dedicated astro camera or cooled CMOS camera for wide field and deep sky work.
- Calibration frames such as darks, flats, and biases to improve stack quality.
AstroBuyAndSell.co.uk offers practical guides and gear reviews that help you evaluate options within your budget. Start with the basics and plan upgrades as your interests sharpen.
Step 3: Planning Your Shoot
The best astrophotography nights are the ones you plan for. A little forethought saves time, improves results, and makes the experience more enjoyable.
Location and timing
- Seek dark sky locations away from city lights. Check local light pollution maps to find dark zones.
- Pick moonless or new moon phases for Milky Way shots to maximize contrast.
- Consider weather patterns and humidity. Clear skies with low humidity usually yield crisper stars.
- Tell yourself to shoot multiple short sessions unless you are chasing a specific project.
Light pollution and sky quality
- The darker the sky, the more you can reveal without heavy processing. If you are near towns, look for parks or higher ground with less light spill.
- A light pollution filter can help in some night photography setups, but start with clean skies first.
Planning tools and resources
- Star maps and planetarium apps help you know where the Milky Way, planets, and bright constellations will appear in the sky.
- Check arrival times for objects you want to photograph and align them with your location’s ideal conditions.
- Use a simple shot list to keep focus during the night. For example:
- Milky Way core shot at 22:30 local time
- Star trails sequence starting at 23:15
- Foreground sunset or twilight silhouettes if planning early evening shots
Step 4: Core Camera Settings You Can Use Right Away
Understanding camera settings is the backbone of good results. Here are practical starting points you can test and refine on your first nights.
Focusing in the dark
- Switch to manual focus and use live view zoomed in to a bright star.
- Fine tune until the star is as sharp as possible, then recheck after you adjust temperature and lens changes.
- If you have a focus peaking feature, use it to confirm sharp edges around stars.
Exposure and shutter speed
- For wide field Milky Way shots with a full frame camera, a common starting point is 20 to 25 seconds.
- For smaller fields or tighter framing, you might use 15 to 20 seconds.
- The goal is to avoid star trails while keeping enough light for a clean image.
ISO and noise
- Start with ISO 1600 to 3200 depending on your sensor performance and lens brightness.
- Higher ISO introduces more noise, but modern cameras handle it reasonably well with proper post processing.
- Keep exposures short enough that you can stack many frames and still maintain a usable total exposure.
White balance and RAW
- Shoot in RAW to preserve dynamic range and color information.
- White balance can be set to around 3800K to 4200K for natural night tones, but do not worry about color immediately; you can adjust in post.
Additional settings worth knowing
- Shoot interval sequences for stacking to reduce noise and increase detail.
- Use manual exposure mode rather than automatic to maintain consistency across frames.
- Keep the noise reduction off during shooting for dark frames that you will subtract later in processing.
Step 5: Composition and Subjects
Composition makes the difference between a snapshot and an image that tells a story. Beginners often start with a simple foreground and a broad view of the sky.
Milky Way and constellations
- A classic Milky Way shot includes a foreground element such as a silhouette tree, rock feature, or a building to add scale.
- Include leading lines or a recognizable subject in the foreground to anchor the image.
Foreground options
- Mountains, lakes, hills, or a quiet landscape can ground the sky story.
- Urban scenes with interesting silhouettes can also work if you manage light pollution well.
- When possible, shoot during blue hour or after dusk to capture a hint of color in the sky.
Star trails and time lapse scenes
- Long stacks of many short exposures create star trails that reveal the rotation of the sky.
- For trails, consider a wide field and a long total integration time to build smooth curves.
Step 6: Beginner Techniques You Will Love
These techniques are approachable for beginners and provide a strong improvement path.
Stacking and calibration frames
- Capture multiple light frames (the actual photography) to stack later in post processing.
- Include calibration frames:
- Darks to measure sensor noise
- Flats to correct vignetting and dust
- Bias frames to calibrate read noise
- Stacking combines many frames to produce a cleaner image with reduced noise and greater detail.
Use of star trackers and remote release
- A star tracker allows longer exposures without star trails, which helps in deep sky and Milky Way shots.
- A remote shutter release or intervalometer reduces camera shake and helps you shoot precise intervals.
Framing and adjustments on site
- Compose the shot with your foreground in mind. Walk the scene and adjust camera placement.
- Take test shots and adjust focus and exposure as needed before committing to a long session.
Step 7: Post Processing Essentials
Post processing is where your photographs come alive. A few deliberate steps can dramatically improve brightness, color, and detail.
Stacking and alignment
- Use stacking software to align and combine light frames. This reduces noise and reveals faint detail.
- Ensure alignment accuracy to avoid blurred results. Recalibrate if necessary.
Color correction and noise reduction
- Balance color to reflect natural tones or enhance the mood you want to convey.
- Apply selective noise reduction to preserve sharp details in stars and foreground.
Software options
- Popular choices include desktop software for stacking and editing, and all in one solutions that handle stacking and processing.
- For beginners consider user friendly tools that provide guided workflows, then as you gain experience explore more advanced options.
Step 8: Practice Plans and Timeline
A structured practice plan helps you stay motivated and improves results faster. Here is a practical 4 week plan you can adapt to your schedule.
- Week 1: Learn the gear and basic settings on a clear night. Practice focusing, exposure, and white balance with broad sky shots.
- Week 2: Do a dedicated Milky Way test shot on a dark night away from city lights. Try 15 to 25 seconds exposures, ISO 1600 to 3200.
- Week 3: Add stacking by taking 20 to 40 light frames and 10 to 20 dark frames. Practice using a remote release and a small amount of post processing.
- Week 4: Try a small deep sky target or a star trails session. Experiment with a simple foreground to create a strong composition.
More frequent practice sessions will help you refine your technique. For ongoing inspiration and practical guides, check the AstroBuyAndSell blog for new tutorials, gear roundups, and observing tips.
Step 9: Troubleshooting Common Issues
Even seasoned astrophotographers run into common challenges. Here are quick fixes to keep you moving.
- Star trails appearing in your shot
- Shorten exposure time or increase the number of frames in a stack.
-
Check for mount alignment and ensure the tracking is accurate.
-
Out of focus stars
- Recheck the live view focus at maximum magnification.
-
Reposition the camera for better stability and ensure there is no dew on the lens.
-
Dew on optics
- Use a dew heater or manual shade to reduce condensation on lens and telescope.
-
Keep batteries warm to avoid rapid temperature changes affecting performance.
-
Poor foreground exposure
- Rebalance light in the foreground with a separate exposure at a lower ISO.
-
Use light painting or a small amount of artificial light to lift the foreground without washing out the sky.
-
Noise and blotchy colors
- Increase the number of light frames and apply careful dark frame subtraction.
- Adjust color balance in post and avoid aggressive NR on the stars.
Step 10: Building a Community and Continuing Education
Astrophotography is a social hobby as well as an art form. Engaging with communities can accelerate your learning and keep you motivated.
- Join online forums and communities to share images, get feedback, and learn from others.
- Attend local astronomy clubs and star parties to network with fellow enthusiasts.
- Read up to date guides and review gear as new cameras, trackers, and software are released.
- Follow reputable blogs and channels for periodic updates on techniques and equipment.
- Share your progress on your own blog or social media to document your journey and get constructive feedback.
AstroBuyAndSell.co.uk is a friendly resource for beginner to advanced enthusiasts. Our articles cover telescope guides, astrophotography techniques, observation tips, and space news to help you stay inspired and informed.
Step 11: Quick Start Summary for Beginners
- Start with a modern DSLR or mirrorless camera and a fast wide angle lens.
- Use a sturdy tripod and a remote release for sharp sky images.
- Plan your shoot for a dark sky location with minimal light pollution.
- Shoot RAW, focus carefully in live view, and begin with 20 to 25 second exposures at ISO 1600 to 3200.
- Try stacking multiple light frames with calibration frames to reduce noise.
- Process your images to balance color and contrast, using stacking tools and [your preferred editing workflow].
- Expand gradually by adding a tracking mount, longer exposures, and more advanced post processing.
- Build a routine of regular practice nights, shot lists, and a simple project plan.
A final note on growth and patience
Astrophotography is a journey. The night sky is vast, dynamic, and endlessly fascinating. Your first shots will be rough around the edges, but with consistent practice you will see your skills sharpen, your images gain depth, and your confidence grow. Celebrate small wins and keep a log of your experiments so you can track what works and what does not on future sessions.
As you explore the night sky, remember that every successful shot begins with planning, the right gear for your goals, careful focusing, thoughtful composition, and a patient post processing routine. If you are looking for a practical starting point, consider a beginner friendly setup with a fast wide angle lens, a capable camera, and a stable tripod. From there you can build up to a star tracker, a dedicated astro camera, or more advanced processing workflows.
If you want more curated ideas, gear suggestions, and step by step tutorials, visit AstroBuyAndSell.co.uk for regular updates on astrophotography techniques and equipment. Happy shooting, and clear skies ahead.